Daily Super Adventure Box W1Z3
WIP
Start
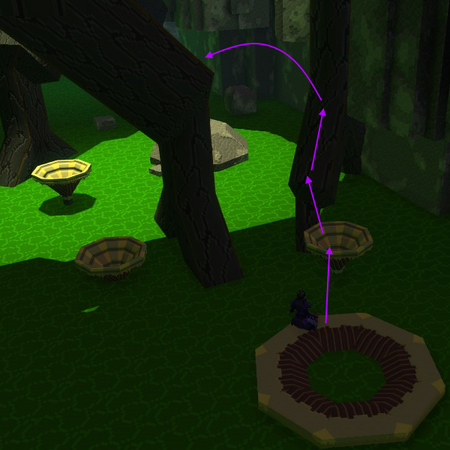
Begin the level as normal, up the hollow tree trunks, but rather than jump across the mushrooms, head to the outside of the horizontal trunk and use the small rock to jump on top, then to the small ledge on the nearby wall. Follow the ledge along to the end and make two long jumps across the flytraps to the opposite area.
From here, there are two ways of proceeding. There are 100 baubles at the end of a secret area, but this involves some relatively precise jumps and a long section through poison water that would need to be restarted if it kills you. Players with an can /gg at the start of this level to ensure they start at full health, but otherwise you may need to rely on healing potions. The end of the route does reward one life though, so it is worth it once you can do it consistently.
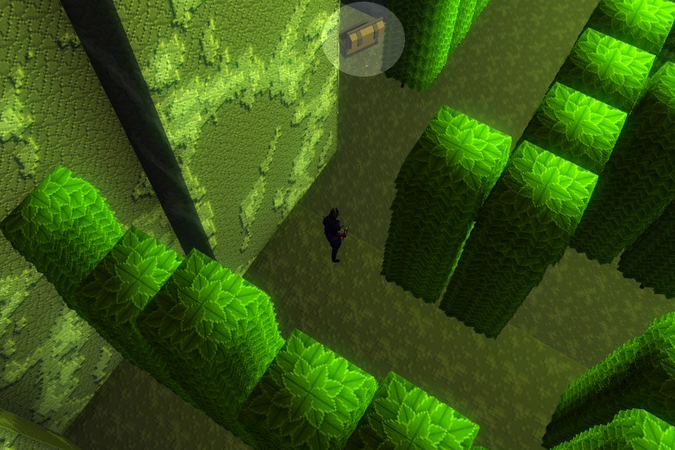
Bomb the wall behind the rock and head through the opening.
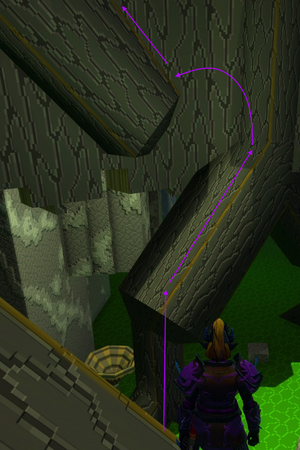
Jump up and to the left until you can see a cannon. Jump on top of the cannon then carefully drop down to land inside and get fired across to a tree branch. Follow the tree branch up to its highest point, then jump down to the right, where you can see some poisoned water.
The poisoned water can rapidly drop your health, though it appears to do so much slower if you spam jump as you go. Jump through the poisoned area until you can hop on top of a small rock to catch your breath. From this rock, jump up to the top of the waterfall, and quickly run along its length until you reach a point opposite the lowest section of rock. Carefully jump across, then jump up to a higher spot, and jump back across the waterfall to land on a rocky ledge. Head left, and jump across another section of poisoned water.
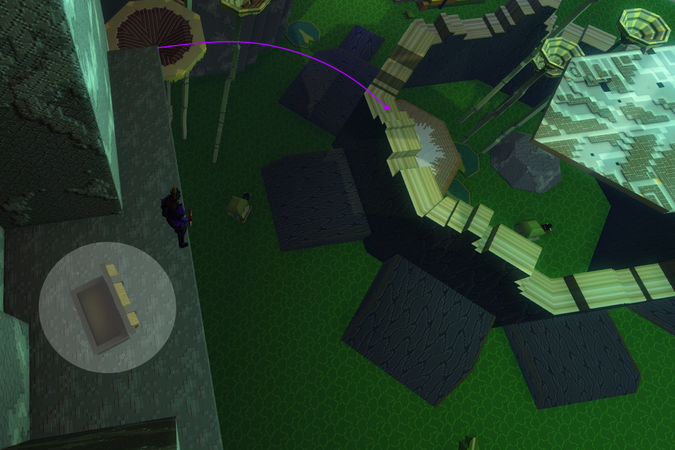
From here, jump up the wall to your left to end up in a more open area. There are two digs (each containing 50 baubles) and a life here. Collect them all, and jump up the smaller rocks to reach a gap that leads you to a spot above the starting area. Look down and you should be able to see the spot where you bombed the wall. Drop down to the flat area directly underneath you.
Bomb here.
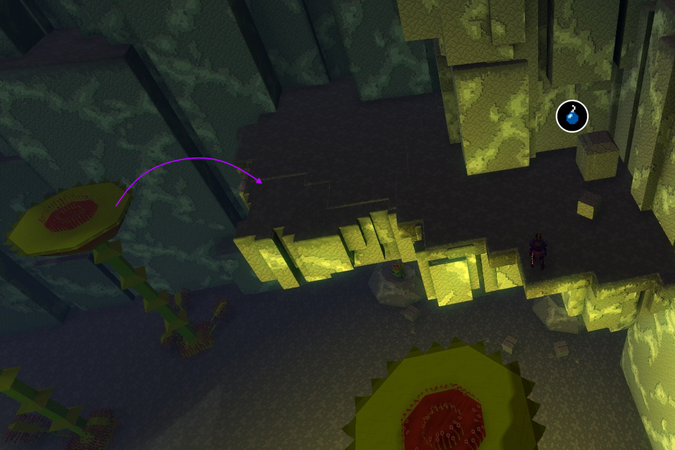
See the cannon on the left, and the poisoned water on the right. The path from the start of the level is also visible below.
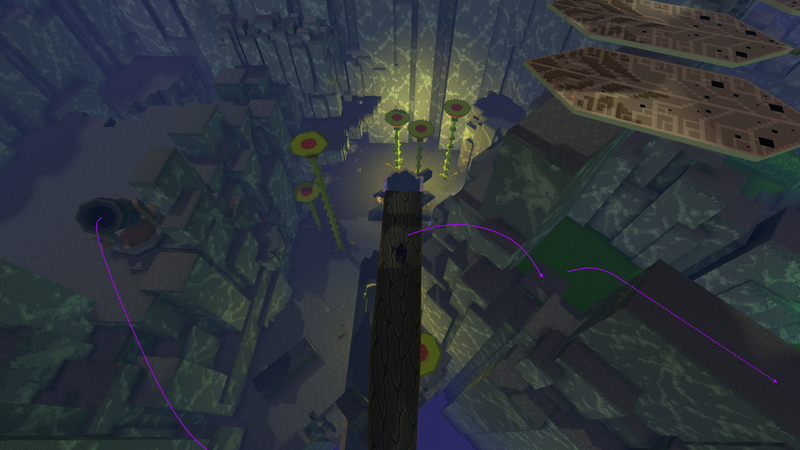
The long path through the poisoned water. Don't forget to spam jump!
Path to the two digs, and back to the previous area.


If you ignored the optional route, jump across the flytraps to the right. This is the same location you drop down to after finishing the optional route. Dig for another chest containing 20 baubles. Jump across the flytrap and follow the wall around to reach a spot where you can jump down into the next area. Head forward, being wary of toads, and activate the next checkpoint.

Checkpoint 1
Before moving forward, there are a couple of digs you can get. The first is in the corner near the checkpoint, between two trees. Contains 10 baubles.

The second is above the area, accessed by running up the root next to the checkpoint and jumping across the flytraps to dig on the small platform at the end. This only contains 10 baubles too, so is easy enough to ignore.

If you spotted the Beedogs in the previous area, you may have noticed them heading through a small gap just to the left of the checkpoint. Follow them, and you'll find yourself in a hedge maze. If there are still beedogs around, you can follow them to find the way through. Otherwise, head forward and take a right into the maze, followed by a left and follow the path until you hit a wall (be wary of frogs in this area). In a small alcove in the wall you can dig for a chest containing 20 baubles.
Now, continue following the path and take a right, followed by an immediate left. Follow the path all the way around and take a right when the path splits. Following this new path around the corner, you should see the maze open up ahead of you, with two sloped areas leading in opposite directions.
Up the left slope is the Queen Beedog and her honeycomb. The time and danger in fighting her are not worth the baubles you get, so skip her unless you're doing the daily. Taking the right slope allows you to jump on top of the maze itself, and hug the left edge until you find a lower spot between two trees. Dig here for 50 baubles. For maximum efficiency, you can /gg here to return to the checkpoint, or just head back up on top of the maze as you're right next to the entrance anyway.
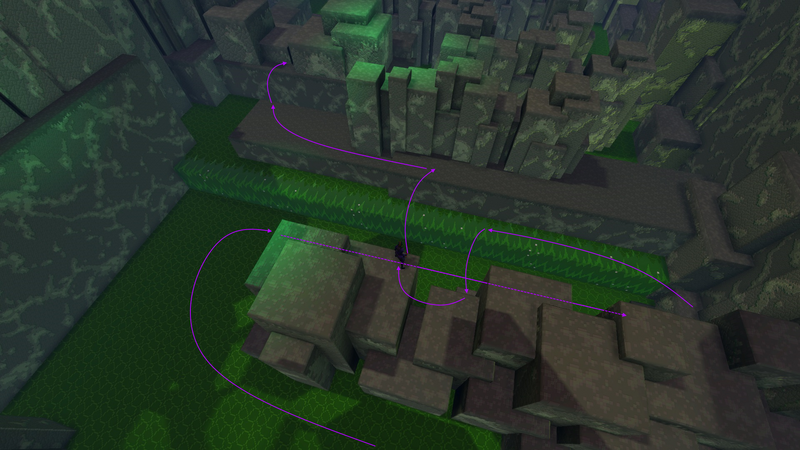
Dig at the end of the first path.
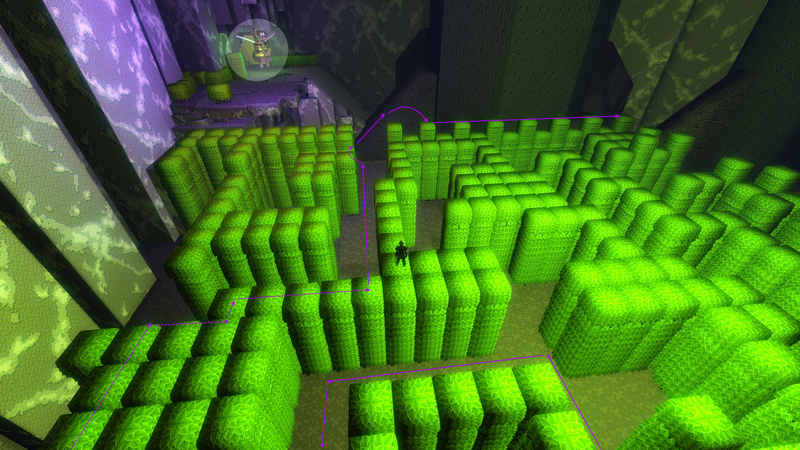
Path through maze, honeycomb, and path to exit area.
Last dig before returning to main route.


Heading through the checkpoint, there is a dig immediately ahead of you, in the corner of the poison lake.

As you reach the tree just before the next checkpoint, head around it via the mushrooms and jump to the wall on the left. Follow it along and jump up a small series of flytraps to reach a raised area with the first chest. After opening, you can continue following the wall to reach the checkpoint.

If not going for the chest, there isn't anything else of note here so just continue to the next checkpoint.
Checkpoint 2
Head forward along the branch, avoiding vines and monkeys.
Hidden behind a waterfall underneath the first branch is a shop containing some items to smash. The shops on this level are quite awkward to reach, so you can probably ignore this one unless you are in a group. It's faster to /gg to return to the checkpoint after, but otherwise you can continue through the poisoned lake to reach the next area.

You wish to go through the higher of the two checkpoint 3 options, so drop down onto the large raised platform and jump up the cluster of mushrooms to the top of the hollow log. From here, you can either do a long jump onto a narrow branch, or if you miss the jump, there's a bouncy mushroom that takes you up to the same spot.

The oozes are on the large platform in the image above.
From here, you can reach two potential daily objectives:
At the far end of a series of leaves (and surrounded by monkeys) is the check for Locksmithing 103.
Additionally, you can run along the branches and leaves to the left, up a small slope and across a flytrap to reach another shop.

Head forward and activate the higher of the two checkpoints.
Checkpoint 3
You now need to make a dash across the collapsing leaves, heading for the right of the large tree ahead. As before, it is important to stay up high - falling will force you to either /gg to return to the checkpoint or miss out on a lot of baubles.
When you finally reach the safety of a branch, you will find the Ooze Farmer on your left and a large, hollow horizontal log ahead. Before going inside, drop down into the hollow tree stump below you to collect 12 baubles, and bounce back out.

There is another shop hidden in the corner behind this hollow stump, but getting back up requires you to first knock down the bouncy mushroom from the lip of the log. Once done, drop down into the shop and take the mushroom back up.

It's now time to head inside the large horizontal log. Rather than travel all the way through, though, head for the small hole on the lefthand side. Head out and climb on top of the log. There are some baubles you can collect here, but the real prize is on another platform to the right. Make a long jump to reach it and dig for 50 baubles. Jump back to the top of the large log.

From the top of the log, drop down towards the lily pads below. You need to hit the crocodile from the lily pad and head across its body to reach the next area.
Once inside, jump across the safe areas, then make a tricky jump from one root to another. Keep heading up the roots, and then use a series of bouncy mushrooms to climb all the way up through a hollow tree.
When you finally reach the top, look below to see the red glitch crystal and carefully drop down to it. Hit up and jump up the short series of platform to reach the glitch.
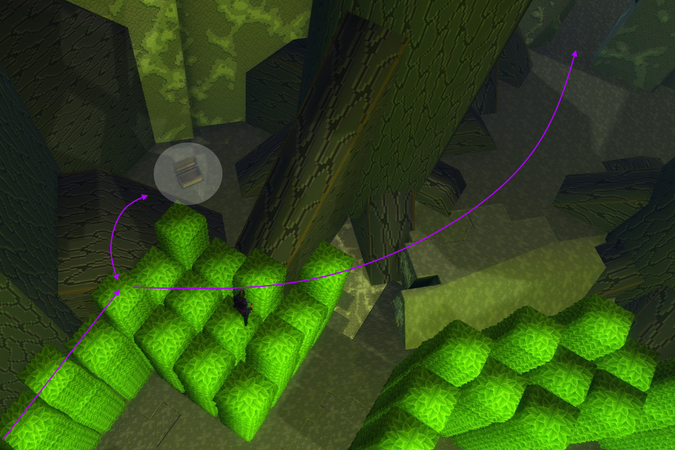
Now head back towards the read of the level and carefully drop down onto a ledge beneath you. Dig here for 20 baubles.
Dig on right, then if going for glitch, drop down onto lily pad below. Shop can be accessed from glitch, but isn't needed for any dailies.
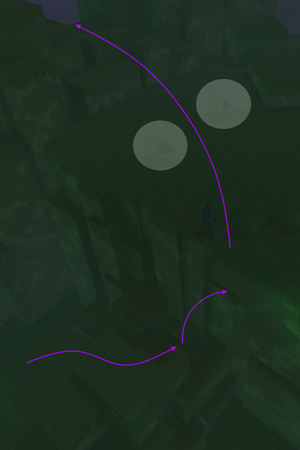
Avoid poisoned water and jump up onto branches.
Series of somewhat tricky jumps.
- W1Z3 Glitch.png
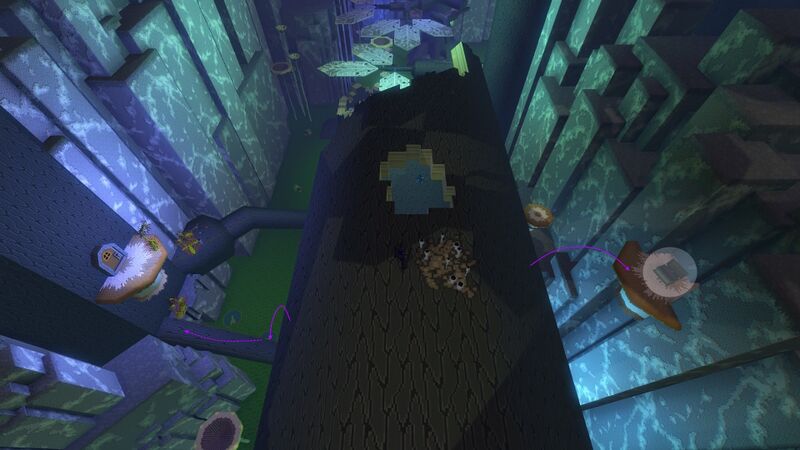
Drop down to glitch crystal on right, then drop down to another dig.
Dig, and jump down into hollow log for an extra five baubles.


If not going for the glitch, you have the option of going for the final chest and/or a 20-bauble dig (same as the one at the end of the glitch route), or just heading straight for the checkpoint.
The final chest is easily accessed in the corner to the right of the checkpoint. From this platform, you can make two long jumps to the tall mushroom and then to the ledge for a 20-bauble dig.

If you took either of the two option routes that ended with the dig, you can drop down into the hollow stump below for an extra five baubles. Otherwise, just head for the checkpoint but don't activate it immediately.
The final shop of the level is found to the right of the checkpoint, at ground level.

There is one final dig spot in this level, that can only be accessed with the checkpoint boost. When boosted up, you need to head forward and curve around to the left to land on a small pillar.
Checkpoint 4
Assuming you made the jump, carefully head along the series of small pillars, hugging the wall. If you manage to reach the end you can jump down and dig for 50 baubles.

King Toad
Once you drop down, King Toad will appear. Run immediately forward and start whacking him while he monologues, until a crystal chunk falls off. Grab it, then wait for him to open his mouth and throw it inside to incapacitate him for a burn phase.
After the burn phase, keep hitting him until another chunk falls off, then head back across the lily pads to a small rock that will be safe from all his shockwave attacks. It is possible to avoid his attacks while staying in melee range, but there's no advantage to it.
When King Toad looks from side to side, he is about to open his mouth again. Rush forward as soon as you see this, and throw the chunk into his mouth for another burn phase. Rinse and repeat.
Comments
Enjoy an ad-free experience & support the website, for less than $1 per month! Upgrade to Premium