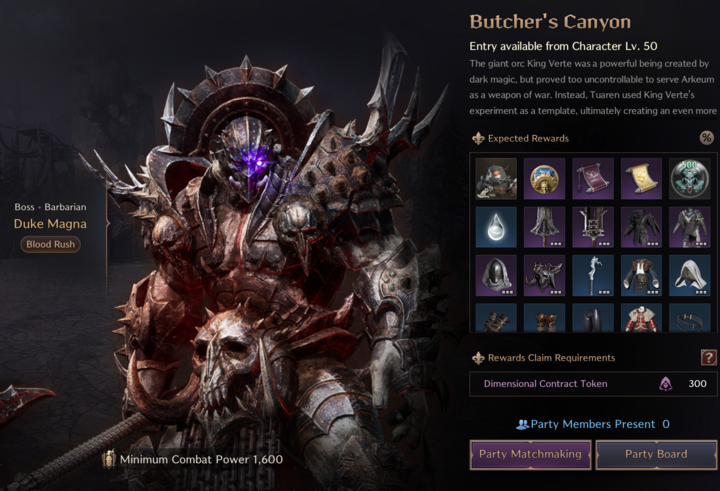
Butcher's Canyon Dungeon Guide: Difference between revisions
No edit summary Tag: Reverted |
No edit summary |
||
| (5 intermediate revisions by one other user not shown) | |||
| Line 1: | Line 1: | ||
{{#seo:|title=Butcher's Canyon Dungeon Guide for Throne and Liberty - {{SITENAME}} | {{#seo:|title=Butcher's Canyon Dungeon Guide for Throne and Liberty - {{SITENAME}}|description=This Dungeon Guide covers all Attack Patterns, Skills, Mechanics and other Tips to beat the Magna Duke Boss in Butcher's Canyon.}}__TOC__ | ||
[[File:Butcherscanyon.png|720px]] | [[File:Butcherscanyon.png|720px]] | ||
== Magna Duke (Boss) == | == Magna Duke (Boss) == | ||
| Line 66: | Line 66: | ||
=== Orc Key Administrator === | === Orc Key Administrator === | ||
The Key Administrator will raise his with a fire aura to charge a stomp attack. Jump when you see the red aura. | The Key Administrator will raise his leg with a fire aura to charge a stomp attack. Jump when you see the red aura. | ||
Notice that if you jump when he releases the aura you will get hit, you should instead jump when as soon as you the the aura. The same applies to the Boss' mechanic. | Notice that if you jump when he releases the aura you will get hit, you should instead jump when as soon as you the the aura. The same applies to the Boss' mechanic. | ||
Latest revision as of 14:41, 14 October 2024
Magna Duke (Boss)
Blockable Attack
A blockable AoE attack occurs at the start and after Fire Beams and Stomp!
Fire Beams
Magna raises his axe with a fire aura, casting multiple fire beams from the ground. Make sure to dodge these beams.
Stomp
Magna will raise his leg and charge a stomp attack. You must jump with the right timing to dodge this attack.
You should jump when you see the battlefield turning red.
Fire Zone
Magna will gather a red aura then pull the party to the center of the battlefield, this area will have layers of fire. He will then prepare to cast an AoE killing all players within this area. One player is trapped in the center, so the others must interact with the red pillars to allow that player to escape.
Players therefore should jump over the fire layers and interact with the red pillars as fast as possible. Standing in a fire layer will stun you as well as deal DoT damage which may kill you.
The blue pillars indicate where the mobs for the Polymorph mechanic will spawn.
Polymorph
The party will get pulled to the center of the battlefield again. This time the player in the center will get polymorphed into a sheep that can't jump over the fire layers. Two mobs will spawn at the blue pillars and will create a safe zone upon their death, your party must pick one to kill. The goal is to get the sheep to the safe zone to cleanse the polymorph.
The sheep will have a filling circle indicator around it, being inside will transfer the polymorph to that player, returning the previously polymorphed player back into their original form. If the sheep state is kept for too long the sheep will explode. There is a cooldown to taking the sheep, so the previous player can't just take the polymorph again.
Therefore players must coordinate with each other to take the sheep polymorph and jump over the fire whilst the others kill the mob. After escaping the zone, the polymorphed player should stand in the blue safe zone created from the mob.
Notable Encounters
These enounters feature mechanics similar to the Boss, they serve as good practice.
Orc Key Administrator
The Key Administrator will raise his leg with a fire aura to charge a stomp attack. Jump when you see the red aura.
Notice that if you jump when he releases the aura you will get hit, you should instead jump when as soon as you the the aura. The same applies to the Boss' mechanic.
Orc Shadow Elder (Elite)
The Shadow Elder will spawn Orc Shapeshifters that transform a player into a sheep with a circle indicator around it. Being inside that indicator will pass the polymorph to another player. Keeping the sheep for too long will cause it to explode.
Polymorphed players should wait a few seconds and pass the polymorph to another player. Remember, don't try to pass back to the player that gave you the polymorph. Make sure to burst down the Orc Shapeshifters as fast as possible. Again, the blue zone from the Shapeshifter's death will cleanse the polymorph.
Orc Shadowmancers (Elite)
You will encounter a zone with layers of fire with three Orc Shadowmancers casting a blue link. You cannot damage the Shadowmancers until the link is broken.
Make sure to stun two of the Shadowmancers simultaneously to be able to break the link.
