Difference between revisions of "Lonely Tower"
| Line 1: | Line 1: | ||
| − | |||
| − | |||
==Introduction== | ==Introduction== | ||
As you start, a short scene between Dagda, Isgarren and Mabon plays out, but there is nothing to stop you from leaving the room and taking the right corridor away from the glowing barrier (don't forget to grab the [https://wiki.guildwars2.com/wiki/Mistlock_Singularity Mistlock Singularity] first). The corridor is covered in '''Despair''' AoEs that inflict {{tooltip|Agony}}, five stacks of {{tooltip|Torment}} and a small amount of damage. They're less threatening than they look so you can just power through and heal later. | As you start, a short scene between Dagda, Isgarren and Mabon plays out, but there is nothing to stop you from leaving the room and taking the right corridor away from the glowing barrier (don't forget to grab the [https://wiki.guildwars2.com/wiki/Mistlock_Singularity Mistlock Singularity] first). The corridor is covered in '''Despair''' AoEs that inflict {{tooltip|Agony}}, five stacks of {{tooltip|Torment}} and a small amount of damage. They're less threatening than they look so you can just power through and heal later. | ||
| Line 9: | Line 7: | ||
The most obvious solution is to take either one or two at a time, and have the remaining players skill the Avatars as they approach. There is an easier way, however, as both {{tooltip|Stability}} and {{tooltip|Stealth}} will negate the interruption entirely, so with enough of either the group could do all four at once. | The most obvious solution is to take either one or two at a time, and have the remaining players skill the Avatars as they approach. There is an easier way, however, as both {{tooltip|Stability}} and {{tooltip|Stealth}} will negate the interruption entirely, so with enough of either the group could do all four at once. | ||
| − | [[File: | + | [[File:Lonely Tower.jpg|600px|class=img-fluid]] |
| Line 24: | Line 22: | ||
===Cerus and Deimos=== | ===Cerus and Deimos=== | ||
| + | [[File:Brothers.jpg|600px|class=img-fluid]] | ||
| + | |||
Players familiar with the strike and raid bosses should immediately recognise the mechanics in this encounter, though even in CM both of the bosses are significantly less formidable. | Players familiar with the strike and raid bosses should immediately recognise the mechanics in this encounter, though even in CM both of the bosses are significantly less formidable. | ||
| Line 51: | Line 51: | ||
Once they are dead, Dagda will summon a portal taking you to the final area. There is a [https://wiki.guildwars2.com/wiki/Mistlock_Singularity Mistlock Singularity] near where you arrive, and you must defeat a number of kryptis to progress. When the last [https://wiki.guildwars2.com/wiki/Incarnation_of_Judgment Incarnation of Judgment] falls, the final boss will appear. | Once they are dead, Dagda will summon a portal taking you to the final area. There is a [https://wiki.guildwars2.com/wiki/Mistlock_Singularity Mistlock Singularity] near where you arrive, and you must defeat a number of kryptis to progress. When the last [https://wiki.guildwars2.com/wiki/Incarnation_of_Judgment Incarnation of Judgment] falls, the final boss will appear. | ||
| − | |||
| − | |||
==Eparch== | ==Eparch== | ||
| − | '''Recommended Sigils:''' {{Sigil|Superior Sigil of Force}}, {{Sigil|Superior Sigil of | + | '''Recommended Sigils:''' {{Sigil|Superior Sigil of Force}}, {{Sigil|Superior Sigil of Demon Slaying}} |
''Condition builds should use their standard sigils and enhancements.'' | ''Condition builds should use their standard sigils and enhancements.'' | ||
| − | Recommended Utility: | + | Recommended Utility: Condition cleanse and [[Guide:What_are_CC_and_Breakbars|Crowd Control]] |
| − | [[File: | + | [[File:Eparch.jpg|600px|class=img-fluid]] |
Revision as of 22:40, 18 August 2024
Introduction
As you start, a short scene between Dagda, Isgarren and Mabon plays out, but there is nothing to stop you from leaving the room and taking the right corridor away from the glowing barrier (don't forget to grab the Mistlock Singularity first). The corridor is covered in Despair AoEs that inflict ![]() Agony, five stacks of
Agony, five stacks of ![]() Torment and a small amount of damage. They're less threatening than they look so you can just power through and heal later.
Torment and a small amount of damage. They're less threatening than they look so you can just power through and heal later.
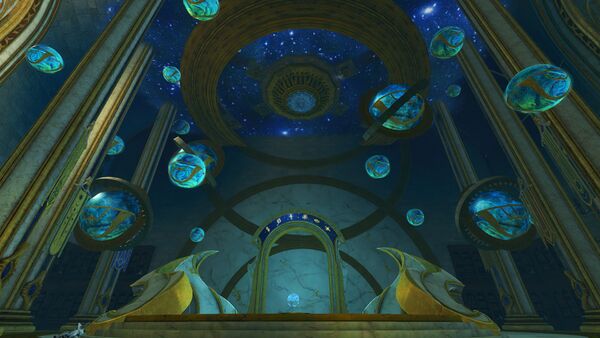
In the room at the end, you'll catch a brief glimpse of an old antagonist and be presented with four Astral Purifier Nodes. Each one must be channeled while you complete a button-matching puzzle like those used to unlock Arcane Chests in the open world. A total of 10 correct buttons must be pressed in a row to activate each purifier, but as you begin interacting, three Avatars of Spite will spawn nearby and move towards you. Around each one is a field that pulses poison, and if they reach the player they will interrupt the channel and force them to start again.
The most obvious solution is to take either one or two at a time, and have the remaining players skill the Avatars as they approach. There is an easier way, however, as both ![]() Stability and
Stability and ![]() Stealth will negate the interruption entirely, so with enough of either the group could do all four at once.
Stealth will negate the interruption entirely, so with enough of either the group could do all four at once.
Regardless of the approach you choose, once all four are active, the Despair AoEs will disappear and you can return to the starting room - though its much faster just to /GG to reset there.
Back at the start, the barrier will drop and you can head down the left corridor instead. Down this corridor, the Despair AoEs are joined by some familiar-looking Grasping Hands that move towards you and inflict ![]() Cripple,
Cripple, ![]() Poison, five stacks of
Poison, five stacks of ![]() Torment and minor damage.
Torment and minor damage.
There is a single Astral Purifier Node at the far end that has to be turned off as before. The rubble makes the Avatars of Spite a little more awkward to deal with, but everyone can defend a single person now so it shouldn't be much trouble.
With the air purified, the next barrier drops and you can progress forward. There is another Mistlock Singularity in the next room. Through the blue barrier is the first encounter of the fractal (you can just walk straight through).
Cerus and Deimos
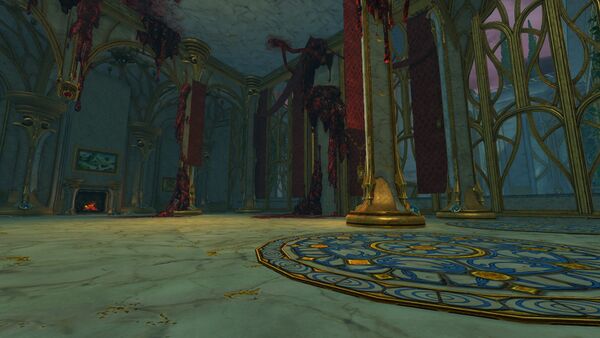
Players familiar with the strike and raid bosses should immediately recognise the mechanics in this encounter, though even in CM both of the bosses are significantly less formidable.
A few seconds after engaging them, each will fixate on the closest target for 20 seconds, following that character (Deimos' fixation has a red marker, while Cerus' is blue). Around five seconds after losing fixation, they will fixate on the current closest player once more. If the two bosses are allowed to get too close to one another, they will gain the ![]() Brothers United buff, which increases their outgoing damage by 50%.
Brothers United buff, which increases their outgoing damage by 50%.
Even at tier 4, their base damage is rather low, so it's not too dangerous to stack them together if the group is strong enough.
As the two bosses' mechanics are practically identical to their original versions but much less dangerous, not too much time will be spent describing their mechanics. Players wishing to know more can see the individual guides for Cerus and Deimos.
Cerus
- Wail of Despair - summons a Despair AoE over each player that hits after five seconds.
- Malicious Intent - Tethers to a random player and after five seconds spawns a Malicious Shadow at the player's current location that walks towards Cerus. If it reaches him, it will be absorbed and give Cerus five stacks of
 Empowered and some barrier.
 - Cry of Rage - A large AoE that Cerus channels over five seconds and deals heavy damage to players who don't dodge it. Unlike the strike version, this can also be blocked.
Otherwise, Cerus will perform a Smash attack that deals moderate damage.
Deimos
- Grasping Hands - A series of stationary AoEs that spawn in sets of three underneath the furthest player. The time the hands last for increases with tier, up to 15 seconds at tier 4. This is similar to the Soul Feast mechanic in the raid encounter. If Deimos is allowed to touch these hands, he will absorb them, giving himself the
 Devour buff that increases his damage by 2% per stack.
 - Rapid Decay - Deimos places an orange AoE under a random player that becomes a black puddle on the floor lasting for ~28 seconds. Touching this puddle causes it to rapidly expand until it covers a large portion of the room, ticking for a small amount of damage.
- - a cascade of conal AoEs that trigger in a circular pattern from front to back, launching players who get hit backwards. The attack can be blocked or evaded, but
 Stability won't prevent the knock.
Once they are dead, Dagda will summon a portal taking you to the final area. There is a Mistlock Singularity near where you arrive, and you must defeat a number of kryptis to progress. When the last Incarnation of Judgment falls, the final boss will appear.
Eparch
Recommended Sigils: ,
Condition builds should use their standard sigils and enhancements.
Recommended Utility: Condition cleanse and Crowd Control
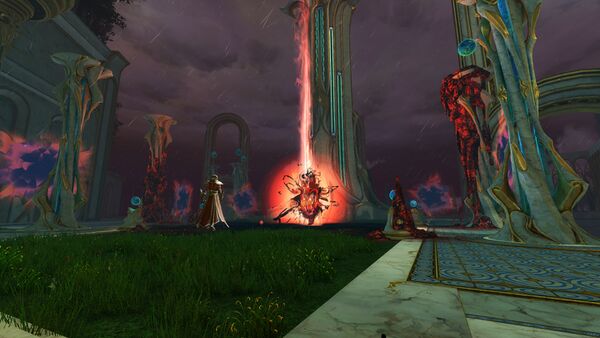
The fight against Eparch revolves around orbs that are spawned from each of Eparch's attacks. Collecting these orbs provides stacking effects to the player, usually in the form of a thematic buff and debuff. At a certain point in the fight, Eparch will consume any orbs that remain on the ground, receiving buffs (but not debuffs) for each one. Success in this fight involves having people collecting these orbs as the fight continues, emphasising classes that can fulfil their role at range. Depending on how each group divides responsibility for collecting these orbs, it may be possible for one or two players to remain on the boss for DPS.
The most essential orb to collect is Envy (green), as this adds a boon corruption effect to Eparch's attacks which very quickly makes the fight overwhelming.
There are six types of orb. The table below lists their effects, the attack that creates them, and the recommended role(s) that should collect them.
| Orb name | Orb colour | Created by | Effect on players | Effect on Eparch | Recommended role |
|---|---|---|---|---|---|
| Rage Globule | Red | Enraged Smash | Increases outgoing strike damage Increases incoming strike damage |
Increases outgoing damage | Power (DPS or boon) |
| Despair Globule | Blue | Rain of Despair | Reduces incoming strike damage Reduces outgoing strike damage |
Reduces incoming damage | Healer or condi (DPS or boon) |
| Envy Globule | Green | Wave of Envy | Increases condition damage Increases condition duration Increases boon duration Increases incoming condi duration |
Attacks corrupt boons | Condi DPS or boon supports |
| Gluttony Globule | Orange | Inhale | Attacks steal life Take periodic damage |
Heals when consuming orbs | Anyone |
| Malice Globule | Purple | Spike of Malice | Increases defiance break damage | Attacks inflict extra conditions | Anyone |
| Regret Globule | Yellow | Summon | Degreases skill activation and recharge times Take damage when using skills |
Reflects damage | Anyone |
Players can only hold one type of orb at a time - picking up an orb of a different type will remove a stack of your existing effect. This means that players can pick up some orbs, then "delete" them by picking up another orb afterwards. The order Eparch uses his attacks in is not consistent, so players may not be able to guarantee they can keep their favoured buff.
During Eparch's Consume attack, he will absorb the orbs of a random player. Thus it is highly recommended that you "delete" the Envy orbs, in order to prevent them being stolen by Eparch. In normal mode, it is "safe" to keep up to nine Envy orbs on a player, as this will convert to three stacks on Eparch, which will be removed when he is broken. It is essential that he can be reliably broken though.
- Enraged Smash - Eparch targets an area in front of him and emite three expanding ring indicators. Immediately after the third one, he slams his greatsword into the ground, dealing very heavy damage in the impact area and launching out a shockwave that knocks players down (the shockwave can be jumped). This attack cannot be blocked. At the same time, <rage fissure>s spread across the ground in a roughly hexagonal pattern that deal a small amount of damage and inflict
 Agony and
  Vulnerability (the fissures can also be jumped over).
- Rain of Despair - Eparch holds his greatsword above his head and fires out a multiude of Despair AoEs that form a spiral pattern around him. These AoEs inflict
 Torment, and last for approximately 15 seconds.
- Wave of Envy - Four arrow indicators come out of the boss and shortly after, he spins, firing thick beams of enegy in each direction that corrupt boons. Players at range can avoid them by moving to a 45-degree angle from the indicators, while players in melee are actually safe from the attack if they are within his hitbox. This attack is unblockable, and while the damage can evaded, the boon corruption cannot.
- Inhale - Eparch spins in place, pulling all players towards him, while creating a dangerous red AoE that ticks for a small amount of damage.
- Spike of Malice - Eparch thrusts his greatsword into the ground, creating a series of AoEs that track all players and deal a small amount of damage for 3-9 seconds, depending on tier.
- Summon - Eparch spins his greatsword in front of him, summoning a number of Veteran Craven.
- Consume - Eparch targets a random player and gains a defiance bar. All orbs that remain on the ground will be stolen by him, and every second, he removes three stacks of any active buff from the targeted player, gaining one stack of the corresponding buff each time while also draining 5% of the targets max health. When the player runs out of stacks, he will apply a stack of a debuff (also called Consume) that reduces the players max HP by approximately 3% per stack. Picking up a new orb will remove one stack of this debuff.
- When broken, Eparch will lose an amount of stacks that depends on the tier. At tier 1, all stacks are removed, in challenge mode, no stacks are removed. At tier 4, if he has three or fewer stacks, all will be removed, but for any number of stacks above this, only one stack will be removed for every four he has (i.e. if Eparch has 4-7 stacks of a buff, he will lose one; if eparch has 8-11 stacks of a buff, he will lose two and so on).
- Finally, as long as the defiance bar remains active, he will gain pulsing barrier that is not removed when broken, which will seriously cut into the bonus damage you can do after breaking him. After being broken, Eparch will be
 Stunned for five seconds, and
  Exposed for 10 seconds.
 - Eparch will repeat this attack 35-40 seconds after being broken.
Eparch does not have a fixed attack pattern, rather seeming to operate on a priority list that somewhat depends on the positioning of players. The further into the fight, the more unpredictable his attacks will become. However, to start with, it will look something like this:
- Enraged Smash and Rain of Despair - Eparch will almost always use these two attacks first, typically preferring Enraged Smash if his target is in melee range, and Rain of Despair otherwise.
- Wave of Envy ⇒ Inhale - After the first two attacks, he normally uses Wave of Envy followed by Inhale. The predictability of this pattern (at least early on) means that players can start to get distance from the boss as soon as Wave of Envy occurs.
- Consume - After 35-40 seconds, Eparch will use consume again. The pattern usually resets after this, but the longer combat continues, the further his cooldowns will drift apart.
Adding further variance is Eparch's aggro mechanic. He seems to target a random player every 10 seconds or so, and will attempt to move into melee range of that character for many of his attacks. As such, he runs about a fair amount, which can lower the number of attacks he performs if he consistently ends up targetting players at range.
Comments
Enjoy an ad-free experience & support the website, for only $1 per month! Upgrade to Premium


