Beginner's Guide To WvW Roaming

Introduction
World vs World is one of the PvP gamemodes of GW2 and perhaps the area of the game where players have the most freedom to create their own gameplay loops, set their own goals. As a result a lot of new players are struggling to understand what to do in WvW.
The goal of this guide is to explain one of the most common ways to play WvW: roaming.
What's Roaming?
In short, roamers are WvW players who've decided to play solo or band together in smaller groups to hunt down enemy players and take lesser objectives on their own instead of joining up with a commander and engaging in massive siege battles.
A group of roamers is sometimes referred to as a havoc squad, although depending on the size of the group the line between roamer and zerg player could get blurry.
Objectives
Here's a couple of things you might do as a roamer:
- Kill supply dolyaks to cut off enemy supply lines.
- Take out sentries.
- Capture and defend supply camps.
- Engage in smallscale PvP be it duels, outnumbered fights or intercepting respawning enemies who are trying to make their way back to their zerg - just to mention a few.
- Linger on the edge of larger battles picking off stragglers or backline players.
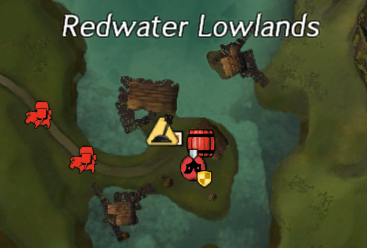
- Take over ruins found in the middle of all 3 home borderlands or shrines on Desert Borderlands.
WvW gives players the freedom to choose which aspect of roaming they want to focus on and to what degree. Some roamers are mostly interested in hanging out at duel spots while others are all about flipping camps and going behind enemy lines. As long as you're maintaining participation you can do whatever you want. Keep an eye on daily Wizard's Vault WvW objectives too as dailies often promote certain objectives and you're bound to find more PvP action around those.
Participation
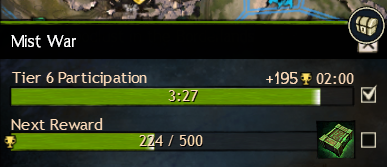
This is the main driving force behind a roamer's gameplay loop. Essentially there are 6 tiers of participation, every 5 minutes you earn WvW reward track progress based your participation level. Higher participation equals faster progression. As long as you're earning rewards you're doing it right, it's up to you how to achieve that.
There's a countdown after which your participation starts decreasing if you're not engaging with any of WvW's main objectives. The maximum amount of time you can go without doing anything is 10 minutes, after which you start losing participation.
To check your participation level simply hover over the chest icon at the edge of your minimap.
The following activities reset the duration of the countdown timer to:
- 10 minutes - capturing or successfully defending an objective with a territory marker (camp, tower or keep) OR killing an enemy player.
- 5 minutes - taking a sentry point, taking a shrine on Desert Borderlands, killing a Veteran Camp Supervisor, killing a Veteran creature with an event attached, taking a mercenary camp, successfully escorting a supply dolyak.
- 2 minutes - killing a supply dolyak or a guard NPC, taking a ruin in the middle of a borderland map.
- 1 minute - killing NPCs related to Mercenary Camp events.
Note: these values aren't additive, they only reset the timer to a set amount. Taking a sentry with 4 minutes left will set it to 5 minutes, not 9.
Essential Masteries
Even in your first few hours in WvW you're probably going to accumulate enough WXP to gain a few WvW ranks - each time you rank up you're awarded 1 WvW ability point. WvW rank is account-bound, but the ability loadouts are per character.
This means that if you rank up 10 times you'll have 10 points to spend on all of your characters and you get to decide which masteries to prioritize on which character.
The most useful masteries for roamers are:
- Warclaw - helps you get around the map faster and reach objectives. The really important thing however comes at rank 166 which unlocks an ability that enables you to dismount other players. Our How to unlock the Warclaw guide contains all the necessary information you'll need to obtain this WvW mount.
- Gliding - allows you to use a glider inside your realm's territory, making vertical travel much easier.
- Guard Killer - increases your damage against enemy NPCs, making it easier to capture camps (especially fortified ones).
- Defense Against Guards - reduces damage taken from enemy NPCs, once again something that's useful when you're taking objectives.
- Provisions Master - improves your ability to gather loot and grants access to new vendors.
- Siege Bunker - reduces damage taken from siege weapons. While roamers generally don't engage in siege activities, sometimes enemies might use them to defend even the smaller objectives. Not the most important mastery but still useful.
- Supply Capacity - lets you carry more supplies with you. Building siege isn't something you do often but it's better to come prepared, and carrying more supply could make all the difference in a small group.
For more details on how and when to spend ability points check out the roaming section of our WvW Ability Point Guide.
Because of how important some of the early masteries are (especially maxing out the Warclaw) we highly recommend you use World XP boosters to earn ranks faster if you can, such as:
- Ascended feasts from
 Chef skill level 500 (10% boost). Eating from feasts placed by other players also works, in that case you don't have to level up the Chef crafting discipline.
- (10% boost, can be slotted into Ascended Amulets). Bought from Laurel Merchants.
 Guild WXP Gain (10% boost, picked up from Nathan the Bartender at the Tavern in Guild Halls with the necessary upgrades).
- (100% boost) found in Birthday Gifts delivered by mail whenever a character on your account ages a year.
Builds And Gear
Once you're ready to delve into WvW all that's left is to get a build. On this link you'll find a wide variety of viable builds for all professions made specifically for roaming.
Don't worry too much about the gear when you're starting out, Exotics will do just fine if you don't have Ascended gear yet. Consumables are recommended but for most builds aren't mandatory either and some of them can be quite cheap.
Warlord's Armor Boxes are worth holding onto, you get these from the Bronze chest of the WvW Skirmish Reward Track as well as the sPvP League Reward Track.
The gear that comes from these is stat-selectable (one time only) which could save you a lot of time and money if you're going after some of the more expensive stats like ![]() Celestial.
Celestial.
Another great (and cheap!) stat-selectable option for WvW players is the Invader's weapon and armor sets - most pieces cost less than 1 gold and can be purchased from a golem named TEID-07 Unified Vendor System. You can find this NPC on all 3 borderlands as well as the Eternal Battlegrounds. This does require some account-bound currencies, but it's not a huge time sink and you'll build up the necessary passively just by playing WvW.
Mechanics
Here's a list of important game mechanics you'll no doubt encounter in WvW.
- A 5 minute buff that appears on some Veteran and Champion NPCs in camps, shrines, towers and keeps right after an objective was taken. Objectives are protected from capture for the first 5 minutes after getting flipped.
- Grants both invulnerability and a damage boost.
- Indicated by a blue aura of flames around the NPC.
- Very much the same as Righteous Indignation but for supply dolyaks, making them immortal.
- This is the result of a camp's owner activating a certain tactic.
- Can be removed by capturing the camp which spawned the dolyak.
- Another dolyak related tactic, makes them go faster.
- Removed when the camp is lost.
- A buff that appears on dolyaks when they're near a friendly player.
- Reduces damage taken by the dolyak by 90%. Taking out the dolyak becomes nearly impossible unless the player is killed or pushed away.
- Getting too close to an enemy sentry will put a Marked debuff on you.
- While the debuff is active enemies will see your location on the map and you won't be allowed to
 Stealth for extended periods of time without getting
  Revealed, forcibly ending your stealth.
Dueling Spots
Another thing you need to know is where to find hubs of 1v1 activity in WvW. Not only because they are useful for honing your skills but also because it's rude to interrupt duels, so please try to respect the fights at these spots.
You may initiate duels by gesturing enemies to follow you and fight, like stowing your weapons repeatedly around them, jumping up and down, or poking them with an autoattack. Once you're both in position and ready to begin fighting perform a /bow emote then wait for them to do the same. The duel starts right after.
If you win a duel don't finish off your opponent! Build distance and let them rally themselves with .
Hero's Lodge/Champion's Demesne (North)
This is the same spot on two different Alpine Borderlands, just across the bridge from the southernmost supply camp of the map.
It's the most popular one for many reasons:
- It's close to the spawn of 2 servers yet zergs rarely cross here.
- There's a sentry to the north and a camp to the south which can be flipped regularly so all sides can maintain participation between duels.
- It's a huge open space that can host multiple duels at the same time.
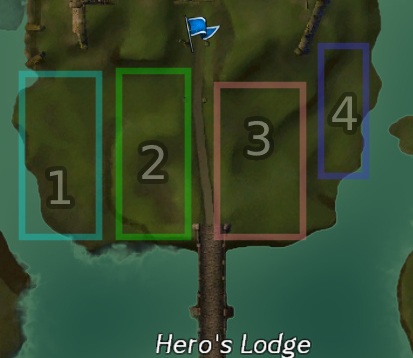
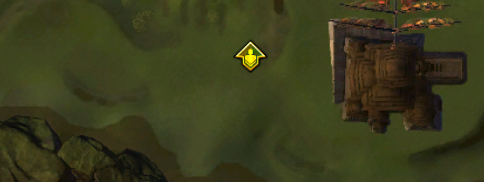
The place is big enough to fit a maximum of 4 duels, although spot #4 is pushing it a bit and is rarely used. Usually spots 3 and 4 belong together. You may use the entire area of all the 4 spots if nobody else is around.
When the place isn't packed the borders are more flexible. You could even use the whole area if you'd like.
Getting there:
- Open the WvW panel and go to Alpine Borderlands.
- Go to the sentry found above Hero's Lodge (or Champion's Demesne, depending on which Alpine map it is). Stay on the highground near the sentry while waiting for an opponent.
Hero's Lodge/Champion's Demesne (South)
This is more of an oldschool spot that predates the participation system. There's more room for dueling, it's completely out of the way of zergs and even the terrain's arguably better, however it's only in the vicinity of the camp but not the sentry, and being this far south means that fewer roamers will naturally stumble upon this spot which means less action.
It's good for having prearranged fights though in case you have friends on one of the enemy servers, or if you've faced another dueler up north but want to continue your fight at a more remote area, perhaps planning to fight for a lengthy period of time.
Getting there:
- Open the WvW panel and go to Alpine Borderlands.
- Make your way to the southernmost edge of the map, past the camp, near the hero point.
Around Stonemist Castle
Stonemist Castle's another popular location but there are some pros and cons here.
While Eternal Battlegrounds is a very active map, sometimes it's too active. It's true that there are several dueling spots around SMC but none of them are particularly quiet places. Zergs travel these areas as much as roamers do and there's no way a group of 50 people is going to respect your duel.
There's a high chance of finding other roamers while doing laps around SMC, but during prime time you might want to avoid it and instead try Alpine Borderlands if you're looking for duels.
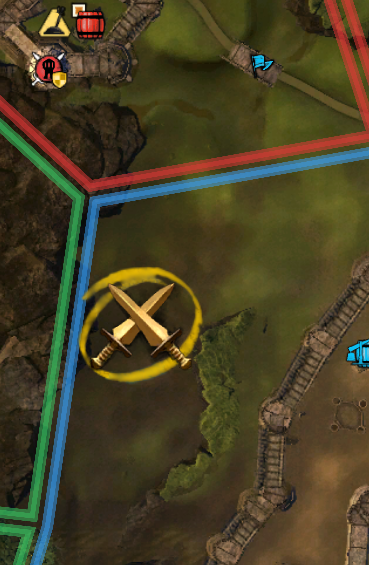
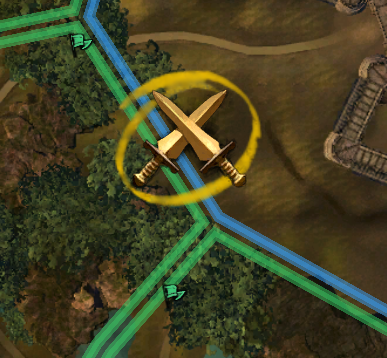
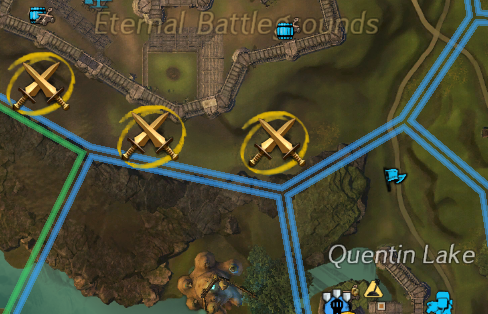
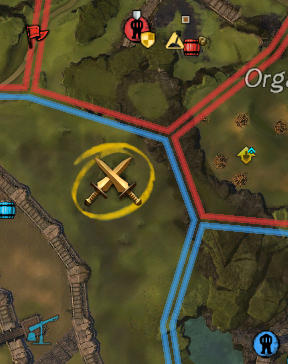
There are 4 spots in total (we've marked them with crossed swords):
- Northwest next to the dredge cave.
- Southwest between the two sentries.
- South of the castle, the corridor above Quentin Lake.
- Northeast between SMC and the Ogre camp.
Getting there:
- Open the WvW panel and go to Eternal Battlegrounds.
- Head to the middle of the map.
Edge of the Mists Arena
Now we're entering the realm of pure 1v1s with no participation or WvW activity involved.
You can't earn the usual rewards in Edge of the Mists but at least this is a place where you're free to fight others without having to worry about losing participation.
What's even better is that here you get to fight even those who are not in your current WvW matchup! Which makes it an ideal place to practice against your friends too.
Downside however is that this arena was made mostly for GvGs, so you'll get booted if some guilds show up to duke it out. Best to avoid during prime time.
Getting there:
- Open the WvW panel and enter Edge of the Mists.
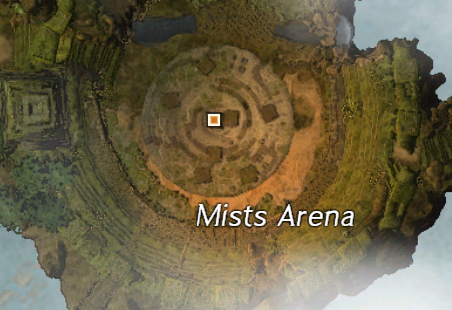
- You should be on an airship now. Before you get off look for an asura gate with the label "Gate to the Mists Arena".
- Enter the asura gate and make your way to the middle of the map where the arena is.
Armistice Bastion
This one is not like the others: Armistice Bastion is a VIP Lounge. To get here you must use an Armistice Bastion pass (either permanent or the 2 week one) which you can buy from the gem store (although it's not always available).
It's a special WvW themed lobby densely packed with all sorts of traders, crafting stations, even a Mystic Forge. Participation levels are frozen here, you'll have access to WvW balance and even team chat but you can't earn rewards.
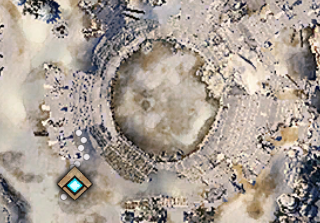
Armistice houses an arena too. Since this zone is regionwide you could meet up with any of your friends here anytime for a fight as long as you all have the pass.
Getting there:
- You must have an . Simply double click the item and it'll take you to the lounge.
- Once there either use the Gladiator Pits waypoint or the special action key which lets you use special teleport skills. Skill #7 takes you straight to the arena.
Comments
Enjoy an ad-free experience & support the website, for only $1 per month! Upgrade to Premium
