Difference between revisions of "Deepstone"
| (One intermediate revision by the same user not shown) | |||
| Line 1: | Line 1: | ||
{{#seo: | {{#seo: | ||
| − | |title= | + | |title=Deepstone Fractal Guide - GW2 - MetaBattle |
|description=Detailed Walkthrough Guide for the Deepstone Fractal in Guild Wars 2. | |description=Detailed Walkthrough Guide for the Deepstone Fractal in Guild Wars 2. | ||
}}{{Guide | }}{{Guide | ||
| title = Deepstone | | title = Deepstone | ||
| − | | description = Guide for Deepstone | + | | description = Guide for Deepstone |
| mode = PvE | | mode = PvE | ||
| section = Fractals | | section = Fractals | ||
Latest revision as of 19:46, 19 April 2023
Introduction
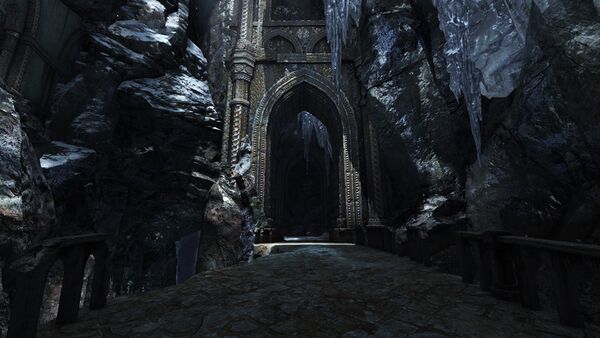
Drop down the series of cliffs to enter the vault of Deepstone. There are a few hostile bats on the way, but you can just run past them. Once inside, you find that the way forward is blocked, and to open it the party must defeat two minibosses that lie to the east and west of the first room. Organized parties can split into two groups and kill both simultaneously, but most will prefer to stick together.
Note that this guide is predominantly for the tier-four version of the fractal, so some mechanics will be much less dangerous at other tiers. An effort has been made to indicate where entirely new mechanics are added at higher tiers, but it is not exhaustive.
| Notable Instabilities | |
|---|---|
| The extra boon duration means that the party’s boon supports can run more offensive gear/traits. | |
| Hamstrung can restrict your movement much more during the fight against the Brood Queen, and can make avoiding AoEs more difficult with the limited room at the final boss. | |
| Additional enemies will spawn behind you during many of the encounters, greatly increasing the pressure on the group if not handled appropriately. | |
| Both the Wind Sprites at the Deepstone Sentinel, and the Spectral Flames at the final boss will gain increased movement speed, requiring their mechanics to be dealt with much faster. | |
West (Deepstone Sentinel)
Out the western hallway is a trap that resembles Tetris. The floor is divided into a grid of runes, and glowing patterns move across the grid from north to south. These s deal heavy damage and apply ![]() Agony if you touch them. If you take enough damage to be downed you are instead returned to the start of the grid. Teleports, movement skills, blocks, invulnerability, etc. can all be used to quickly reach the other end without taking enough damage to be reset.
Agony if you touch them. If you take enough damage to be downed you are instead returned to the start of the grid. Teleports, movement skills, blocks, invulnerability, etc. can all be used to quickly reach the other end without taking enough damage to be reset.
At the far end of the grid are two small circular runes. To deactivate the trap and progress forward, one person must stand on each rune at the same time. There is a small grace time on the interaction when traveling from the left (west) rune to the right (east) rune, which means that a single player with access to a teleport or portal can trigger both.
Recommended Sigils: and
Recommended Utility: ![]() Stability
Stability
Prestack boons at the Mistlock Singularity here and head inside the room.
The Deepstone Sentinel is an air elemental that can cover the arena with a – a spiral of AoEs around the boss that explode after a second, applying ![]() Daze. The area directly underneath the sentinel is not hit, so it is recommended to stack here if you can.
Daze. The area directly underneath the sentinel is not hit, so it is recommended to stack here if you can.
The elemental’s other main attack is – a gust of wind that applies ![]() Chill,
Chill, ![]() Weakness and
Weakness and ![]() Agony.
Agony.
At 80%, 50% and 20% health (as well as 60% and 40% at higher tiers), the Deepstone Sentinel will summon a Wind Sprite underneath a random player – indicated by a bright orange AoE. A second and a half later, the Sprite will start to move towards the nearby cliff edge. As it moves, it pulls nearby players into it and disables them while constantly dealing minor damage, ![]() Cripple and
Cripple and ![]() Bleed via . The only skill the captured player has is Shout for Help which will ping the player’s location on the minimap. Other players will need to CC the Wind Sprite to release them. Captured players will fall to their deaths if the Sprite reaches the cliff edge.
Bleed via . The only skill the captured player has is Shout for Help which will ping the player’s location on the minimap. Other players will need to CC the Wind Sprite to release them. Captured players will fall to their deaths if the Sprite reaches the cliff edge.
After defeating the sentinel, an orb will appear. Interacting with it will return to you the crystal at the entrance. One player will need to interact with the crystal to charge it up.
East (Brood Queen)
Heading east, you will immediately encounter webs. Standing in them will slow your movement, but they are otherwise harmless. However, is a spider nest nearby that will constantly spew out aggressive little arachnids until destroyed.
The path forward is across a narrow, wind-swept bridge. Every six and a half seconds, a pattern of bright orange AoEs will appear across the bridge, and a second and a half later, anyone still stood in the area will be blown off the bridge. Along the way are three more spider nests, and a pair of runes next to the second nest will stop the wind. As in the western hallway, a single player with a teleport or portal can trigger both runes at once if they go from the left rune to the right (north to south).
Recommended Sigils: and
Recommended Utility: Boon Removal and Cleave
Once the trap is disabled, take the Mistlock Singularity and head into the room.
Within are two elite Broodmothers, guarding a nest each. Only the Broodmothers need to be killed, but it will be worth destroying the nests as well if the pressure from the extra spiders is too high.
With the broodmothers dead, the real miniboss will spawn: The Brood Queen. Additional spiders will spawn throughout the encounter, so cleave damage will be very useful.
The Brood Queen and some of the other spiders will apply a lot of ![]() Poison, but otherwise their attacks are fairly simple. The main one to watch out for is the Brood Queen’s – indicated by an arrow on the ground, the Brood Queen rushes forward, dealing heavy damage and knocking players back.
Poison, but otherwise their attacks are fairly simple. The main one to watch out for is the Brood Queen’s – indicated by an arrow on the ground, the Brood Queen rushes forward, dealing heavy damage and knocking players back.
At 50% health, the Brood Queen will become temporarily untargetable and spawn in several Veteran Shadow Imps. She will also clear her conditions and give herself ![]() Protection and
Protection and ![]() Regeneration, so it may be worth bringing a class that can strip boons, though they don’t get reapplied.
Regeneration, so it may be worth bringing a class that can strip boons, though they don’t get reapplied.
All remaining imps and spiders will disappear when the Brood Queen dies, and an orb will spawn nearby that returns you to the start.
Interact with the crystal to charge it, and if this was the second time it was charged, a new miniboss will spawn in the first room, blocking the door.
Center
You have a new Special Action Key: ![]() Light of Deldrimor. This skill has a few functions, but for now, it is required to fight the next miniboss.
Light of Deldrimor. This skill has a few functions, but for now, it is required to fight the next miniboss.
Recommended Sigils: and
Recommended Utility: ![]() Stability
Stability
By default, the Shadow Minotaur is invulnerable and indicated only by a mass of corrupted light. Players within 1000 units of the creature will be targeted by , which ticks for a small amount of damage and reduces movement speed.
Using the ![]() Light of Deldrimor while next to the Shadow Minotaur will reveal it and create a small area of light (indicated by a white circle) that continually applies Light Vulnerability to targets inside it for five seconds, causing them to take 10% increased direct damage and move 20% slower.
Light of Deldrimor while next to the Shadow Minotaur will reveal it and create a small area of light (indicated by a white circle) that continually applies Light Vulnerability to targets inside it for five seconds, causing them to take 10% increased direct damage and move 20% slower.
When revealed, the Shadow Minotaur’s main attack is – a sweep that knocks players back and applies ![]() Burning. It can be avoided by strafing to the Minotaur’s left side.
Burning. It can be avoided by strafing to the Minotaur’s left side.
If any players remain at range, the Shadow Minotaur will to them and gain ![]() Quickness and
Quickness and ![]() Might.
Might.
Around eight seconds after being revealed, the Shadow Minotaur will conceal itself again. While hidden it will resume hitting nearby players with and draining their life with , so it’s important to keep using the ![]() Light of Deldrimor to prevent this.
Light of Deldrimor to prevent this.
Below 75% health, some Veteran Shadow Imps and a Veteran Shadowbeast Mauler will begin spawning. They must also be killed to open the door.
Hidden Treasure
While you can keep going forward at this point, you can also search through the previous areas for hidden treasure. There are a total of 10 hidden treasures throughout the fractal (they can be found anywhere, including the areas ahead). The easiest way to find them is to look for a small sparkling effect on the ground. This effect can be seen before you unlock the ![]() Light of Deldrimor, so you can note their locations as you play. Using the
Light of Deldrimor, so you can note their locations as you play. Using the ![]() Light of Deldrimor at the location will reveal the chest, which contains a small amount of loot. You can return to search the rest of the fractal after killing the final boss.
Light of Deldrimor at the location will reveal the chest, which contains a small amount of loot. You can return to search the rest of the fractal after killing the final boss.
Hole in the Ground
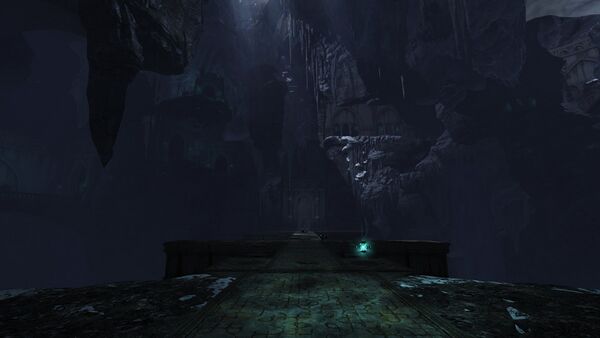
The room ahead appears to be nothing but a deep pit. After a short conversation, part of the way across will be revealed, and you can use the ![]() Light of Deldrimor to find the rest. The path is random, but will always move from the orb near the start west to the second orb, then north and east to the third, then north and west to the final orb. The path can curve back on itself, but you must reveal it “in order” and can’t skip ahead. The easiest way to deal with this is to have each member of the party activate their
Light of Deldrimor to find the rest. The path is random, but will always move from the orb near the start west to the second orb, then north and east to the third, then north and west to the final orb. The path can curve back on itself, but you must reveal it “in order” and can’t skip ahead. The easiest way to deal with this is to have each member of the party activate their ![]() Light of Deldrimor in turn, then move along the newly revealed path and have the next player activate their Light. Done correctly you can reveal the path in a very short time. Note that
Light of Deldrimor in turn, then move along the newly revealed path and have the next player activate their Light. Done correctly you can reveal the path in a very short time. Note that ![]() Alacrity will reduce the cooldown of the
Alacrity will reduce the cooldown of the ![]() Light of Deldrimor.
Light of Deldrimor.
The orbs at the sides of the maze function as checkpoints and can be activated by the ![]() Light of Deldrimor at any time. Thus certain leap skills are capable of reaching the orbs and activating them without having to complete the entire puzzle. To do this you will need to hit the wall near the orb so that the game considers you to be on the ground and thus lets you activate the
Light of Deldrimor at any time. Thus certain leap skills are capable of reaching the orbs and activating them without having to complete the entire puzzle. To do this you will need to hit the wall near the orb so that the game considers you to be on the ground and thus lets you activate the ![]() Light of Deldrimor.
Light of Deldrimor.
Once the group reaches the second orb, Spectral Flames and Shades will begin to spawn around the area and move towards the group. The Shades aren’t particularly dangerous, but the Spectral Flames will remove tiles underneath them as they travel, indicated by them beginning to glow brightly and disappearing four and a half seconds later. Kill the enemies as they approach, but otherwise you do not need to adjust your strategy – the ![]() Light of Deldrimor will prevent tiles in the area from being removed for five and a half seconds so you shouldn’t be in danger as long as everyone is alive to keep using it. Should you fall into the pit, you will be returned to the previous orb. These orbs generate a safe area of tiles around them that cannot be removed.
Light of Deldrimor will prevent tiles in the area from being removed for five and a half seconds so you shouldn’t be in danger as long as everyone is alive to keep using it. Should you fall into the pit, you will be returned to the previous orb. These orbs generate a safe area of tiles around them that cannot be removed.
After reaching the third orb, the path will head a little north. There is a black smoky barrier preventing you from moving forward, but it is slightly behind the edge of the pit, so a player can jump to this edge and run along it to activate the final orb without needing to reveal the path. When the final orb is activated all enemies will despawn and the entire floor will be filled in.
The Elevator
The hallway terminates at a large stone tile with a central rune. If a player stands on this tile for three and a half seconds it will begin lowering.
Any players that miss the elevator can interact with the small glowing rune that appears nearby to be transported down to the rest of the group. Part-way down you will be ambushed by five Veteran Shadow Imps. After killing them, five more Imps will spawn along with a Veteran Shadowbeast Mauler and an Elite Shadowbeast Bloodsucker. Once they all die, the elevator will resume moving. Pulls will be very helpful in dealing with these enemies efficiently.
The Voice
Recommended Sigils: and
Recommended Utility: and ![]() Stability
Stability
At the bottom is the final room, and you should recognize a similar tile pattern as the pit you recently crossed, hinting at the central mechanic of this fight. Remember that the ![]() Light of Deldrimor increases your damage against targets standing in its AoE, so keep using it on the boss even if you don’t need to protect the tiles. You will gain between one and four stacks of Residual Updraft when you start the encounter, depending on tier (one stack at tier four, four stacks at tier one). Each stack will prevent you from falling to your death one time during the encounter. After falling, you will float back to the approximate location where you fell, and while you have some control over your position you may immediately fall down again if there are no tiles nearby.
Light of Deldrimor increases your damage against targets standing in its AoE, so keep using it on the boss even if you don’t need to protect the tiles. You will gain between one and four stacks of Residual Updraft when you start the encounter, depending on tier (one stack at tier four, four stacks at tier one). Each stack will prevent you from falling to your death one time during the encounter. After falling, you will float back to the approximate location where you fell, and while you have some control over your position you may immediately fall down again if there are no tiles nearby.
Pre-buff at the Mistlock Singularity and approach The Voice. As you do so, some arena tiles will fill in, giving you a bit more room to move, at least for now. The Voice will attack players at range with – a ranged orb attack that hits in a moderate-sized AoE and begins to delete tiles where it lands. It bounces an addition one to three times depending on tier, with the same effect.
In melee, The Voice will use a powerful autoattack chain that stacks ![]() Might on itself and ends in – a moderate-sized cone in front of the boss that applies
Might on itself and ends in – a moderate-sized cone in front of the boss that applies ![]() Vulnerability and
Vulnerability and ![]() Agony. The Voice will not move, so you can retreat to range if you are finding it difficult to deal with the autoattack.
Agony. The Voice will not move, so you can retreat to range if you are finding it difficult to deal with the autoattack.
At 10% health intervals, The Voice will teleport to a random point at the edge of the arena (it can teleport to the location it’s already at) and continue attacking as before.
When it teleports at 80% health, The Voice will use Spirit Siphon – it will gain a defiance bar and tether to players. While unbroken, The Voice will deal moderate damage to the tethered players and give itself barrier every second. In addition, tethered players will destroy tiles underneath themselves, so it is important to break the bar quickly. The boss will be ![]() Exposed for three seconds upon being broken. If the bar remains unbroken for 13 seconds then the attack ends automatically. Be aware that The Voice has no obligation to teleport to areas that have tiles, so you may be required to create a route to it. This makes ranged CC or teleports especially valuable.
Exposed for three seconds upon being broken. If the bar remains unbroken for 13 seconds then the attack ends automatically. Be aware that The Voice has no obligation to teleport to areas that have tiles, so you may be required to create a route to it. This makes ranged CC or teleports especially valuable.
At 75% health, The Voice will begin using – a small two-part AoE that appears underneath a random player and tracks them as it fills with color. Once the inner section is full (after two seconds), the AoE will stop tracking the player. The AoE will detonate two seconds after that, hitting players still within the AoE for heavy damage, ![]() Daze,
Daze, ![]() Knockback,
Knockback, ![]() Agony and destroying tiles within the AoE. If any player is hit by this attack, it will immediately repeat, targeting that player. There is no limit to the number of times this attack can chain between players. Worse, while it normally can’t chain from a player to themselves, it can do so to a downed player, making it incredibly dangerous and difficult to res them. Therefore it is essential to drop this AoE away from others, and not to walk into it yourself.
Agony and destroying tiles within the AoE. If any player is hit by this attack, it will immediately repeat, targeting that player. There is no limit to the number of times this attack can chain between players. Worse, while it normally can’t chain from a player to themselves, it can do so to a downed player, making it incredibly dangerous and difficult to res them. Therefore it is essential to drop this AoE away from others, and not to walk into it yourself.
When The Voice teleports at 70%, two Shades will spawn around the arena. These Shades have two significant attacks.
The first is – a long-range line AoE that ![]() Launches players, deals heavy damage, and destroys tiles.
Launches players, deals heavy damage, and destroys tiles.
The second is – an AoE similar to a necromancer’s mark appears below a player and starts ticking for a small amount of damage. Three and a half seconds later, the rift pulls players still within the AoE towards it and the Shade teleports to the rift. While the rift isn’t dangerous by itself, it can trap you inside other AoEs, and so is probably the most troublesome attack in the encounter. Fast groups can ignore the spirits and focus on phasing the boss, but slower groups may want to deal with the shades first – bear in mind, the Shades’ teleports can make this tricky.
Split Phase
When The Voice reaches 60%, it will return to the center of the arena and become invulnerable and untargetable. It is strongly recommended to kill any remaining Shades now. Around the edge of the arena, multiple Spectral Flames will spawn and begin moving towards The Voice, destroying tiles as they go. The Spectral Flames move faster at higher tiers.
The split phase continues until 10 Spectral Flames have been removed – either by killing them or by them reaching The Voice and being absorbed. When this happens, The Voice will release a that deals increased damage for each flame absorbed (it will not occur if none reach it). Even one absorbed flame is sufficient to deal extreme damage, so minimizing the number is essential. The boss also gains 1% health for each absorbed flame, though The Voice only teleports to the side the first time it passes a health threshold, so it will not teleport again at 60% should it gain health.
Phase 2
Phase 2 is much the same as before, with no additional mechanics added:
At 50%, the boss will teleport and spawn three Shades.
At 40%, the boss will teleport and use Spirit Siphon.
At 30%, the boss will teleport and spawn three Shades.
At 20%, the boss will repeat the split phase. Deal with it exactly as the first.
Phase 3
After the split phase, the boss will remain in the center of the arena until it dies, making this phase relatively easy (assuming Shades have been dealt with). All remaining tiles will fill in upon defeating The Voice, and you can stay to continue searching for the hidden treasures. You can also return to the earlier part of the fractal by walking into the small glowing rune back at the elevator.
Comments
Enjoy an ad-free experience & support the website, for only $1 per month! Upgrade to Premium
