Cosmic Observatory Strike Mission Strategy Guide
This guide provides tips and strategies for the thirteenth strike mission and how to defeat Dagda in the Cosmic Observatory. If your group is struggling, the guidelines in the Introduction to Raiding will apply here as well. Check out the glossary page if you're not familiar with a term used in this guide and make sure to run an optimal build from our list of recommended builds for this encounter.
Introduction
Though the barrier, Dagda awaits. She is a relatively simple boss with only a few key mechanics, but punishment for repeated failure is quite high.
The most dangerous mechanics in this encounter apply stacks of [Residual Anxiety], which last for three minutes. This debuff has no inherent effect, but if a player reaches 10 stacks they will switch sides and become hostile to the group [Until downed, or does it have finite length?].
Dagda will only ever move as part of mechanics, and many of her attacks only hit players in melee range. A group that is really struggling to survive could stack a short distance away from the boss and range her, but this is quite an extreme approach.
Strategy
The fight starts as soon as someone attacks Dagda.
Dagda's basic attack chain is Strike ⇒ Vengeful Strike ⇒ Starburst. The final attack of this chain fires a cosmic projectile that can be blocked, or reflected for a bit of damage.
Every 10-20 seconds, Dagda targets a [random/lowest health/furthest?] player with a large green arrow that will deal 90% of that player's max health as damage after seven seconds. If at least half of the group (rounded down) stands between Dagda and the targeted player, then this damage will be shared evenly between the players [living players or total in party?]. Otherwise, every player will take 50% of their max health as damage and receive a stack of ![]() Infirmity for 30 seconds, reducing incoming healing by 25% per stack.
Infirmity for 30 seconds, reducing incoming healing by 25% per stack.
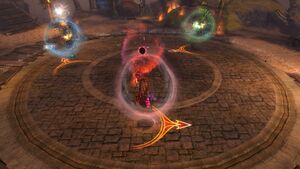
Every so often, rather than , Dagda will spin in place, firing out multiple projectiles in all directions and pulsing heavy damage in the area around her. The projectiles can be blocked or reflected, though they deal no damage to Dagda when reflected.
If Dagda is below 90% health, she may teleport a short distance away to perform this attack, but she will teleport straight back to the center afterwards so it may be worth just waiting for her to return.
Similar to the Vermillion, the Arsenite will then move to the fixated player and attack with a basic auto chain. The first two strikes deal moderate damage, the third deals heavy, and every other time it’s used (starting with the first) it launches a at the most distant non-fixated target, dropping at their location and then returning to the Arsenite, hitting players on the way with . It may be worth having the kiter slightly off-stack to control where the is dropped.
At 80%, the Arsenite will retreat and the final watchknight will appear.
Prototype Indigo (blue)
As it appears, the Indigo prepares an attack that covers the entire area, apart from a 120-degree sector behind it. The AoE flips once the watchknight is broken, so the group will be safe if coming from the Arsenite’s location. Players hit by either AoE are killed instantly by .
Once broken, the Indigo fixates on the closest target and prepares the next attack.
Effectively the opposite of the Arsenite’s attack, the Indigo starts pushing all players away, dealing more damage the further they are. Players at the very edge of the AoE will be ![]() Exposed. This attack repeats after using twice (see below).
Exposed. This attack repeats after using twice (see below).
Challenge Mode only: Gaining ![]() Exposed by failing the mechanic will also apply a stack of
Exposed by failing the mechanic will also apply a stack of ![]() Empowered to the Watchknight that lasts until it dies.
Empowered to the Watchknight that lasts until it dies.
Unlike the others, the Indigo is ranged and will not move from its location, instead attacking the fixated player from range with . This attack chains to the closest player, and then again, dealing more damage the further those players were. As such, it is actually beneficial for the blue fixation to be on the stack.
Approximately every eight seconds (after three uses of ), three random players will be hit with and given a medium-sized AoE around them that detonates after a few seconds, damaging anyone inside.
Every other time occurs (starting with the first), one of the three is further afflicted with – dropping a small blue pylon that tethers to them and begins a countdown indicated above the player’s head. After five seconds, the targeted player will drop a AoE at their location and be teleported back to the pylon, taking damage depending on how far from the pylon they moved.
The player by will need to balance dropping the AoE in a safe location against ensuring they do not move so far that they get downed. Bear in mind that the damage from is fairly low, so players should not put themselves in a poor position to avoid hitting any other players with it. One technique could be to have the players with move towards the closest so that the one selected for has a small distance to move to drop it in a convenient location.
Phase 2
Upon pushing the Indigo to 80% it will disappear and existing AoEs will be cleared. Shortly after, all three watchknights will return and start their breakbar attacks. Breaking any of them will invert the safe location as normal, but also prevents the other two from being broken. The goal is to identify which watchknight needs to be broken to create a safe location that is not covered by the other two watchknight’s AoEs.
The correct watchknight to break in this phase is the Arsenite (green). This leaves the space surrounding the Vermillion (red) safe and highlights it with a white AoE, so make sure everyone can get back to it.
Now you will face the watchknights again, but they will occasionally be assisted by a second watchknight that regularly appears and performs their breakbar attack.
Challenge Mode
In Challenge Mode, the fight immediately starts at the puzzle in Phase 2, and the setup is random. As in normal mode, the correct Watchknight to break will never repeat across the three phases. This means after the first two puzzles have been performed correctly you will know that the correct Watchknight to break is the remaining color.
The exact positioning of the watchknights is not fixed, but the patterns are consistent:
All three watchknights spaced evenly around the middle, all facing different directions.
Break the Arsenite (green), and hide near the Vermillion (red).
The Arsenite in the center of the arena, with the other two watchknights facing it.
Break the Vermillion (red), and hide behind the Indigo (blue).
The Vermillion and the Arsenite facing the same direction, with the Indigo directly between.
Break the Indigo (blue) and hide in the safe half of the Vermillion’s (green) AoE.


In addition to the above, in Challenge Mode the phases are adjusted slightly so that Phase 3 occurs at 60% health and Phase 4 occurs at 20% health.
Aside from these, structural changes between Normal and Challenge Modes are minor:
- There is now a 13 minute enrage timer
- Bosses have more health and deal more damage
- Bosses gain stacks of
 Empowered if players fail their special mechanics
 - AoEs are larger
Prototype Vermillion (red)
If completed correctly, all three watchknights retreat, and after a short delay the Vermillion returns alone. Make sure not to stand in the middle of the arena as anyone that does will be instantly killed by the watchknight’s when it appears. It fixates on the closest player upon landing and starts . Players will still have the debuffs from the last time this attack was used, so make sure to be on the correct side.
A few seconds after , the Arsenite will appear and begin to channel . It will disappear again immediately upon completion, but breaking it will mean that the next time it appears, it will be ![]() Stunned and
Stunned and ![]() Exposed for five seconds. Bear in mind that the AoE will flip when broken. The Arsenite will reappear every 30 seconds until the Vermillion is phased. Its position can change each time, but it will always be approximately halfway between the middle of the arena and the edge.
Exposed for five seconds. Bear in mind that the AoE will flip when broken. The Arsenite will reappear every 30 seconds until the Vermillion is phased. Its position can change each time, but it will always be approximately halfway between the middle of the arena and the edge.
Except for the appearance of the Arsenite, this phase plays out the same as the first Vermillion phase. At 40% (60% in challenge mode), the Vermillion retreats once more and the Arsenite returns.
Prototype Arsenite (green)
If previously broken, the Arsenite will appear ![]() Stunned and
Stunned and ![]() Exposed. It is joined almost immediately by the Indigo, who performs . Shortly after this attack finishes, the Arsenite begins .
Exposed. It is joined almost immediately by the Indigo, who performs . Shortly after this attack finishes, the Arsenite begins .
The Indigo will return every 30 seconds if the Arsenite isn’t phased, and the Arsenite will leave at 40% (60% in challenge mode). The Indigo always appears close to the center of the arena.
Prototype Indigo (blue)
Following the pattern, the Indigo will appear and attack similarly to phase one, with the Vermillion assisting at the end of and every 30 seconds thereafter. It phases at 40% (60% in challenge mode). Like the Arsenite, the Vermillion will appear approximately halfway between the middle of the arena and the edge.
Phase 3
Another “puzzle” much like the start of Phase 2, with the watchknights positioned differently. This time you want to break the Vermillion (red) to create a safe area behind the Indigo (blue). Players wishing to pick up fixations should note that the active watchknight is the one that appears first.
Vermillion and Arsenite
After solving the puzzle, both the Arsenite and Vermillion appear, the Vermillion to the east and the Arsenite to the west. The Arsenite remains shielded so players should focus on the Vermillion. Both the watchknights go through their usual attack patterns.
At the start of this phase, the Vermillion will prepare and as it nears completion, the Indigo will appear and perform . It is quite useful to break the Indigo in this phase, as this creates the most safe space which makes it much easier to keep the Vermillion and the Arsenite separate.
This phase is where strategy starts properly coming into play: By default, the shielded watchknight will not perform their special attack (, or ), but if the two active watchknights are allowed to be close to each other they will tether together, buffing the shielded knight with ![]() Power Transfer and allowing it to use these attacks – making the fight much harder. Thus it is recommended to have the kiter try to pick up the Arsenite’s fixation and lead it away from the group. Ideally, this player should have the ability to keep themselves alive as well as provide some kind of assistance to the group from range. The player fixated by the Arsenite is not affected by debuffs from , so they don’t need to worry about having to suddenly move close to the Vermillion.
Power Transfer and allowing it to use these attacks – making the fight much harder. Thus it is recommended to have the kiter try to pick up the Arsenite’s fixation and lead it away from the group. Ideally, this player should have the ability to keep themselves alive as well as provide some kind of assistance to the group from range. The player fixated by the Arsenite is not affected by debuffs from , so they don’t need to worry about having to suddenly move close to the Vermillion.
Be aware that in this phase the stack is going to be targeted by , so they will need to move more frequently as both bosses will be dropping .
Arsenite and Indigo
Once the Vermillion has been reduced to 10% (20% in challenge mode), it will disappear and the Arsenite becomes vulnerable. Shortly after, the Indigo reappears in the middle of the arena and begins attacking, and shortly after that, the Vermillion will return to perform its defiance bar attack. During this phase, the Indigo will not move from the middle, so everyone can focus on the Arsenite and tank it around the edge of the arena to ensure it is out of tether range. As previously mentioned, it is beneficial if the blue fixation remains in the stack, so you can effectively ignore the Indigo in this phase. The kiter can resume kiting the off the stack, but they will not be targeted if they pick up the blue fixation.
This is perhaps the phase where consistently breaking defiance bars is most valuable. The small size of the safe zone created when the Vermillion returns makes it difficult to safely remove from the stack, and forcing the Kiter to move in close runs the risk of allowing the Arsenite and Indigo to tether together and start using their special abilities - both of which further restrict movement.
Indigo and Vermillion
Upon phasing the Arsenite to 10% (20% in challenge mode), it retreats and a shielded Vermillion returns to the east of the center. The kiter should pick up the Vermillion’s aggro and pull it away from the Indigo. It is important to stay stacked during this phase, as the Arsenite will return to perform during , which will make it very difficult to reposition. Hence you want everyone to already be on the same half of the arena, and either break or ignore the Arsenite based on which side needs to be safe.
As the kiter will be fixated, they cannot be the target of , so a second player may wish to try to kite it during this phase.
Phase 4
Upon phasing the Indigo to 10% (20% in challenge mode), the watchknights disappear, then return to perform the final puzzle. The correct one to break is the Indigo (blue), which will create a safe area consisting of a semicircle around the Vermillion (red).
You will now face all three watchknights at once. The Vermillion spawns to the north, the Arsenite to the west, and the Indigo to the east. This can be chaotic, but with little health left each, they fall quickly. The Vermillion is the only one you can damage at first, so have a player kite the Arsenite away and focus the Vermillion down. The two shielded watchknights cannot tether together. As all three are active in this phase, there also will not be any breakbar attacks, which are perhaps the greatest threat.
When the Vermillion dies, the Arsenite can be attacked, and with the Arsenite dead you can finally kill the Indigo.
Comments
Enjoy an ad-free experience & support the website, for less than $1 per month! Upgrade to Premium