Difference between revisions of "Silent Surf"
m |
|||
| Line 1: | Line 1: | ||
| + | {{#seo: | ||
| + | |title=Silent Surf Fractal Guide - GW2 - MetaBattle | ||
| + | |description=Detailed Walkthrough Guide for the Silent Surf Fractal in Guild Wars 2. | ||
| + | }}{{Guide | ||
| + | | title = Silent Surf | ||
| + | | description = Guide for Silent Surf | ||
| + | | mode = PvE | ||
| + | | section = Fractals | ||
| + | | icon = Mini Kanaxai.webp | ||
| + | }} | ||
==Introduction== | ==Introduction== | ||
You start this fractal investigation with your new best friend, Captain Thess. Rummage in the crate near him to pick up some {{tooltip|Survey Gear}}, with a limited number of charges of each ability: | You start this fractal investigation with your new best friend, Captain Thess. Rummage in the crate near him to pick up some {{tooltip|Survey Gear}}, with a limited number of charges of each ability: | ||
Revision as of 11:46, 3 July 2023
Introduction
You start this fractal investigation with your new best friend, Captain Thess. Rummage in the crate near him to pick up some ![]() Survey Gear, with a limited number of charges of each ability:
Survey Gear, with a limited number of charges of each ability:
 Grappling Hook - a grappling hook that launches you toward the location you select.
 Parachute - a temporary parachute that prevents you from taking fall damage and can be slightly steered.
 Black Powder Charge - a big explosion that launches you in the air - good in case of emergencies.
- Skill 5 - an unlimited-use ability that fires a small light orb, allowing you to see better. Only one orb can be active per player.
For now, all you have is a single parachute and a big hole to fall into, so take a leap of faith and make sure to deploy your parachute before you become a pancake. Should you die to fall damage, Captain Thess will helpfully teleport you back to him to allow you to try again.
Once you safely reach the platform below, Captain Thess will join you and you can rummage in a new crate to gain ![]() Grappling Hook. Aim it at the platform across from you to grapple there. Here you will find two zip lines taking you further down. The second zipline terminates in a wall that drops you down, so be ready with your
Grappling Hook. Aim it at the platform across from you to grapple there. Here you will find two zip lines taking you further down. The second zipline terminates in a wall that drops you down, so be ready with your ![]() Parachute!
Parachute!
Captain Thess will be unable to join you until four players have reached this next platform. When all four stand in the white circle, Captain Thess will be able to portal in. This also allows the fifth player to join the rest of the group if they have been struggling to spelunk.
There is a Mistlock Singularity here, suggesting a fight is ahead. Sure enough, you are ambushed by a group of Bats and Spiders. Dispatch them and Captain Thess will activate another supply crate for you.
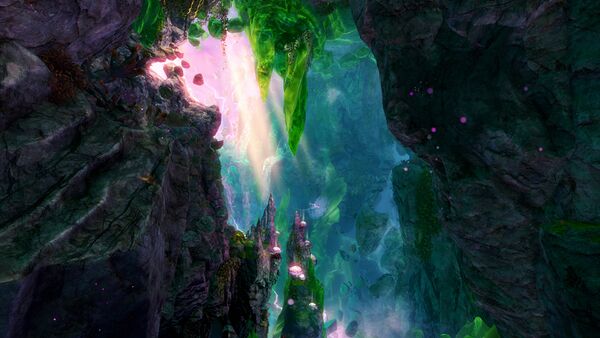
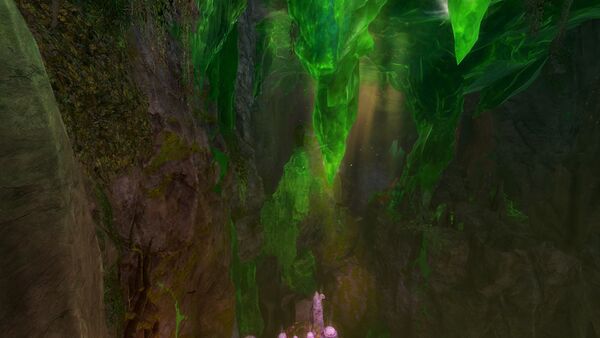
At this point, the spelunking becomes significantly more challenging. To progress, you'll need to jump down below, landing on one of the large mushrooms beneath you (it doesn't matter which one). This will launch you forward, but not far enough. Near the apex of your path, activate the ![]() Parachute and drift towards the far platform, and grapple onto the stalactite with a swirling wind effect around it. If you aren't going to make it, you can use
Parachute and drift towards the far platform, and grapple onto the stalactite with a swirling wind effect around it. If you aren't going to make it, you can use ![]() Black Powder Charge to give yourself a boost.
Black Powder Charge to give yourself a boost.
On the next platform, look for a small vent (Wind Cannon) indicated by a red cog icon. Hopping into it will take you to another platform, where there is another white circle to stand in to bring Captain Thess forward.
As before, the Mistlock Singularity indicates an ambush - this time a group of Naga. Upon defeating them, you can access another supply crate and a new Wind Cannon becomes available. The Wind Cannon fires you up and you will automatically activate a zipline midair. The zipline ends at another stalactite, dropping you down below. You should be able to land on the bouncing mushrooms below, but if in doubt you can use your ![]() Parachute. It is also easier if you use your mount button to disengage from the zipline slightly early.
Parachute. It is also easier if you use your mount button to disengage from the zipline slightly early.
The bouncing mushrooms will launch you into another Wind Cannon that in turn deposits you on a small platform.
To progress, you will need to reach the next cluster of bouncing mushrooms in the distance. This can be achieved in a number of ways, but the intended way is likely to use the two stalactites with swirling wind effects to grapple across. The first stalactite is slightly out of reach, so you will need to jump towards it and activate your ![]() Grappling Hook before you fall too far.
Grappling Hook before you fall too far.
Once you reach the mushrooms, they will launch you into yet another Wind Cannon, which fires you onto a zipline, then finally terminates at a wall, dropping you down to the final platform. To survive this final drop you will need your ![]() Parachute, or alternatively you can fire a
Parachute, or alternatively you can fire a ![]() Grappling Hook at the ground which saves you for some reason.
Grappling Hook at the ground which saves you for some reason. ![]() Black Powder Charge will also work.
Black Powder Charge will also work.
Once four players have made it through, you can summon Captain Thess once more and prepare for the next ambush. This time it is a corrupted Naga with some Corrupted Luxon Sailors. Be ready, as a miniboss will spawn shortly after they are defeated.
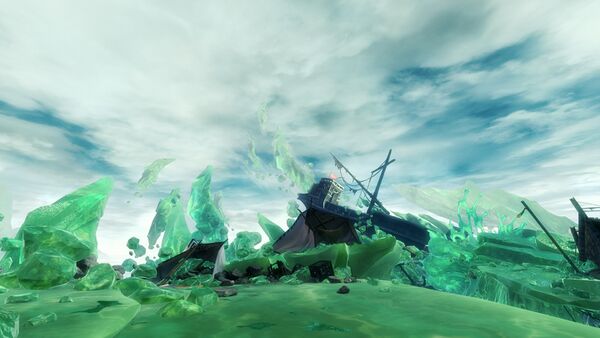
Corrupted First Mate Dolus
Corrupted First Mate Dolus appears and immediately charges up Dread Visage - a ![]() Fear attack indicated by a large eye above his head. This sends Captain Thess off the platform into the void below. Players should be sure not to look at him lest they suffer the same fate (he is invulnerable until this attack ends regardless).
Fear attack indicated by a large eye above his head. This sends Captain Thess off the platform into the void below. Players should be sure not to look at him lest they suffer the same fate (he is invulnerable until this attack ends regardless).
Shortly, First Mate Dolus will prepare an attack called Frightening Speed - all players receive a medium-sized AoE and a Roman numeral above their head. After a short delay, the boss will shadowstep to each player in turn, leaving behind a damaging vortex for two seconds. There will be a sixth AoE at the boss's starting location, that he will leap back to at the end. The attack can be dodged, but be aware that vortices other than yours hurt significantly more.
Otherwise, the boss doesn't do much else.
After defeating Corrupted First Mate Dolus, a shadow portal opens up that takes you back to previous platforms. You can use this to resupply your ![]() Survey Gear, as the earlier crates contain more ammo. This will be useful for the upcoming fight.
Survey Gear, as the earlier crates contain more ammo. This will be useful for the upcoming fight.
All that is left to do is jump down into the void below. Here you will find that Captain Thess didn't actually survive the fall, and you've fallen into a trap.
Unknown Demon
Interacting with Captain Thess's body will trigger the final boss - an Unknown Demon. Shortly after appearing, three smaller Aspects of the demon will also appear at the platform edge, but they cannot be targeted or attacked.
- - As the fight starts, the Unknown Demon will use its own version of the fear attack you saw earlier but all three Aspects are using it too. This means that you need to move towards the platform edge so you can safely look away. You can use
 Resistance,
  Stability or a stunbreak to prevent the
  Fear, but for each eye you are looking at, you will take 35% of your max health as damage in addition to
  Blind and three stacks of
  Torment. occurs every ~42s.
- Rending Storm - As you return from the , a random player is targeted by a small AoE as the Demon throws a spinning axe in their direction. This creates a ticking damage AoE that lasts for 30 seconds, ticking for a small amount of damage and applying five stacks of
 Bleeding per tick. This attack repeats every ~25s, and an additional player will be targeted each time after the first occurence within a phase.
Otherwise, the Unknown Demon will use basic attacks that inflict ![]() Bleeding and
Bleeding and ![]() Torment. The Aspects have their own basic ranged attacks that are unthreatening, but every 30 seconds or so they will launch an AoE shot that applies
Torment. The Aspects have their own basic ranged attacks that are unthreatening, but every 30 seconds or so they will launch an AoE shot that applies ![]() Agony and
Agony and ![]() Poison - a combination that will significantly reduce the effectiveness of healing to people hit.
Poison - a combination that will significantly reduce the effectiveness of healing to people hit.
 Gathering Shadows - Every 10% health, the Demon gains a defiance bar and attempts to summon another Aspect onto the platform. Breaking it will
  Stun the Demon and leave it
  Exposed for five seconds, but give it a stack of
  Dread Defiance - a buff that makes the next defiance bar larger, and the
  Stun duration shorter. If you fail to break the bar, an additional smaller demon is summoned on the platform, and the next time the defiance bar appears it will resume from the strength it was at.
- Note: It is possible that additional Aspects summoned in this way are able to use
 Phantasmagoria (see Split Phase 1).
Other mechanics will not happen until after the defiance bar finishes, and appears to take priority over Rending Storm. This means that depending on your group's DPS these mechanics might "queue", resulting in them happening less frequently.
Split Phase 1
At 66% health, the Demon goes invulnerable and reveals its true identity: Kanaxai! It teleports to the middle of the platform and prepares . Players will be targeted by each of the smaller demons with a beam attack called ![]() Phantasmagoria. This applies an effect to the player (indicated on their buff bar) that reduces outgoing and incoming damage. Shortly after, the Aspect will relocate to one of five smaller platforms surrounding the main one, leaving behind a faint blue orb that refreshes
Phantasmagoria. This applies an effect to the player (indicated on their buff bar) that reduces outgoing and incoming damage. Shortly after, the Aspect will relocate to one of five smaller platforms surrounding the main one, leaving behind a faint blue orb that refreshes ![]() Grappling Hook ammo. Then, a ghostly figure appears in the middle of the platform and fires a beam of light towards the platform the Aspect retreated to. There is also see a red crossed sword icon on the minimap indicating the location. Only the affected player can see the Aspect, the ghostly figure, or the crossed swords icon.
Grappling Hook ammo. Then, a ghostly figure appears in the middle of the platform and fires a beam of light towards the platform the Aspect retreated to. There is also see a red crossed sword icon on the minimap indicating the location. Only the affected player can see the Aspect, the ghostly figure, or the crossed swords icon.
The player should use their special action key to switch to their ![]() Survey Gear, grapple across to the small platform, and kill the demon (they have very low health). The Unknown Demon's attack will be canceled if all Aspects are killed, otherwise everyone takes heavy damage and
Survey Gear, grapple across to the small platform, and kill the demon (they have very low health). The Unknown Demon's attack will be canceled if all Aspects are killed, otherwise everyone takes heavy damage and ![]() Agony for each remaining Aspect.
Agony for each remaining Aspect.
Note: In some cases, people will be able to see others' Aspects and attack them. If they kill someone else's Aspect, then the targeted player will be unable to remove ![]() Phantasmagoria, so this is not recommended.
Phantasmagoria, so this is not recommended.
Phase 2
Now the fight resumes with another attack, but this time there are four Aspects on the platform.
- - Immediately after ends, all players will be targeted by a large AoE and a Roman numeral, as at First Mate Dolus. has the same cooldown as , so one will typically follow the other, but they can become desynced over time.
Kanaxai's version of this attack is far more dangerous than Dolus's, so players should be particularly wary of the final vortex when the boss returns to its starting location.
Split Phase 2
This Split Phase is identical to the first, except that there are now four Aspects to deal with.
Phase 3
In addition to there being five Aspects on the platform, they are now able to use ![]() Phantasmagoria. One player will be targeted every 40 seconds, and the effect will end automatically if it is not dealt with within 30 seconds (with the Aspect returning to the platform).
Phantasmagoria. One player will be targeted every 40 seconds, and the effect will end automatically if it is not dealt with within 30 seconds (with the Aspect returning to the platform).
In addition to the effects of the debuff, the Aspect being on a platform will make significantly more dangerous (facing east will remain safe). An Aspect that is in the middle of applying ![]() Phantasmagoria will not gain the eye over their head and so is safe to look at.
Phantasmagoria will not gain the eye over their head and so is safe to look at.
It seems that ![]() Phantasmagoria will not overlap with certain mechanics, which means a fast team may end up not getting this attack at all in the final phase. Per the earlier note, it may also be that only Aspects summoned by failing to break
Phantasmagoria will not overlap with certain mechanics, which means a fast team may end up not getting this attack at all in the final phase. Per the earlier note, it may also be that only Aspects summoned by failing to break ![]() Gathering Shadows are able to use this attack.
Gathering Shadows are able to use this attack.
Comments
Enjoy an ad-free experience & support the website, for less than $1 per month! Upgrade to Premium
